Before hitting the road on your RV adventure, you’ll need to get your RV in shape for springtime travel. Whether you stored your RV for the winter or took it out on a few snowy RV trips, you probably winterized your RV (we hope so). Now that spring is here, it’s time to de-winterize your RV and enjoy a well-earned vacation. De-winterizing an RV is a multi-step process that can start at home, but it’s always best to leave the full de-winterization to the professionals.
In this guide to all things de-winterizing, we’ll share tips on how to de-winterize an RV and additional insight on getting your RV plumbing or water systems ready for spring as well. Some steps can be done at home, but others are best addressed by an RV technician.
The Importance of RV De-Winterizing
If you winterized your RV, you’ll need to de-winterize it. RV de-winterization is a process that takes place in the spring or summer, whenever you’re taking your RV out of its winter hibernation. It includes a series of steps RVers take to reconnect anything that’s been disconnected, inspect batteries, and remove antifreeze from plumbing systems.
The main reason why RVers must de-winterize an RV is to flush antifreeze and other chemicals from the freshwater and plumbing system. During the winter, and especially if your RV is placed in storage, these chemicals are added to prevent any remaining freshwater from tanks, lines, and pipes from freezing. When water freezes, it expands, often damaging these vital systems. Once temperatures get above freezing, anti-freeze is no longer necessary, so you’ll need to de-winterize your RV plumbing.
Beyond removing antifreeze from your RV’s plumbing, the de-winterizing process should include checks and inspections of several exterior and interior systems. These include your RV’s batteries, tires, interior appliances, roof, and more. There are several checks you can perform yourself before taking your RV in for a professional de-winterizing service.
How to De-Winterize an RV at Home
For RVers looking to hit the road as soon as possible, there are several checks and inspections you can perform on your RV to expedite the de-winterization process. These include:
- Checking the roof for leaks or damage: If you choose to store your RV for the winter, we recommend doing so under a solid roof with a cover over it. If your RV was stored properly, the chances of having roof damage when you take it out in the spring are slim. However, it is still best practice to give your roof a thorough inspection as small leaks, cracks in the AC unit sealant, or rust could be lingering from your last trip. If you find any, make a note and mark them for the RV technician to look at.
- Check your tire pressure: This is important whether you’re de-winterizing a camper or a large motorhome. Over a few months in storage, especially in cold weather, your RV’s tires will lose around 2-3 psi per month. If you have noticed a drop, re-inflate your tires to their proper level according to the manufacturer’s handbook. Make sure to also check your tires, including the spare, for any cracks or other issues.
- Inspect all interior and exterior appliances: As part of your de-winterization checks, inspect all exterior and interior appliances to make sure they’re in working order. These checks can include plugging-in the microwave and testing it, extending the awning and slide-outs, firing up the grill and stove, and more. If you find any issues or have winterized appliances, Lazydays RV offers repair and appliance de-winterization in our service packages.
- Check your RV batteries: When you’re de-winterizing a travel trailer or any other RV, the batteries are always an important component to check. Perform a visual inspection of your RV’s batteries to check for any visible corrosion or cracks. Batteries can experience significant discharge if they are not maintained properly during winter storage, so we recommend checking the voltage before taking your RV in for service. Make a note if the fluid levels are low and if you need to replace your batteries remember a discharged battery can freeze and break.
- Inspect and clean the interior and exterior: At the end of your pre-maintenance check, inspect the rest of your RV. You should check the exterior window seals to see if they’re loose, inspect the paint for any chips, make sure the windshield doesn’t have any cracks, and look out for any other damage. Inside the RV, look for any additional leaks, mold, damage to the floor, and other issues. Once your inspections are complete, clean the exterior of your RV to get rid of any dust and dirt. Inside, you can dust in the kitchen, living and sleeping areas, clean any appliances, and change out any bedding.
De-Winterizing RV Plumbing and Water Systems
One of the biggest concerns RVers have when de-winterizing their campers, RVs, and motorhomes is the plumbing. Freezing pipes are a huge concern during winter, but the steps taken to prevent damage during the winter must be undone come the spring and summer to ensure easier use of your RV.
Special attention should be given to de-winterizing RV plumbing and water tanks. In most cases, it requires simply flushing out any antifreeze and sanitizing the system with a round of bleach. But this can be a tough task depending on your RV’s setup, so it’s often best to leave any plumbing maintenance and de-winterization to the professionals.
RV De-Winterizing Steps for Professionals
For the more complex parts of the de-winterization process, Lazydays RV offers an extensive de-winterization RV maintenance package and other services that will have your RV ready for months of incredible adventures. Our de-winterization services include:
- Basic De-Winterization: As part of our basic de-winterization package, our master certified technicians drain and flush your RV’s plumbing system and all water tanks. Bypassed water heaters are reconnected, and all systems are checked for any water damage. At an additional cost, appliances can be de-winterized. This involves draining, flushing, and cleaning the dishwasher, refrigerator, and sinks.
- RV Battery Service: As part of our RV battery service package, Lazydays RV technicians will clean the terminals and posts, test CCA (cold-cranking amps) and voltage, apply anti-corrosive, and top off the fluid. This package includes up to six batteries.
- Roof AC Service: Recommended at least once every 12 months, our roof AC service is a comprehensive package that ensures you’re comfortable throughout the year. This service includes an inspection of your roof AC unit, an acid wash, cleaning of the inner coils, an amp-draw test, and replacement of AC gaskets and filters. Debris can build up over months of storage, which is why we recommend this service at the start of every peak travel season.
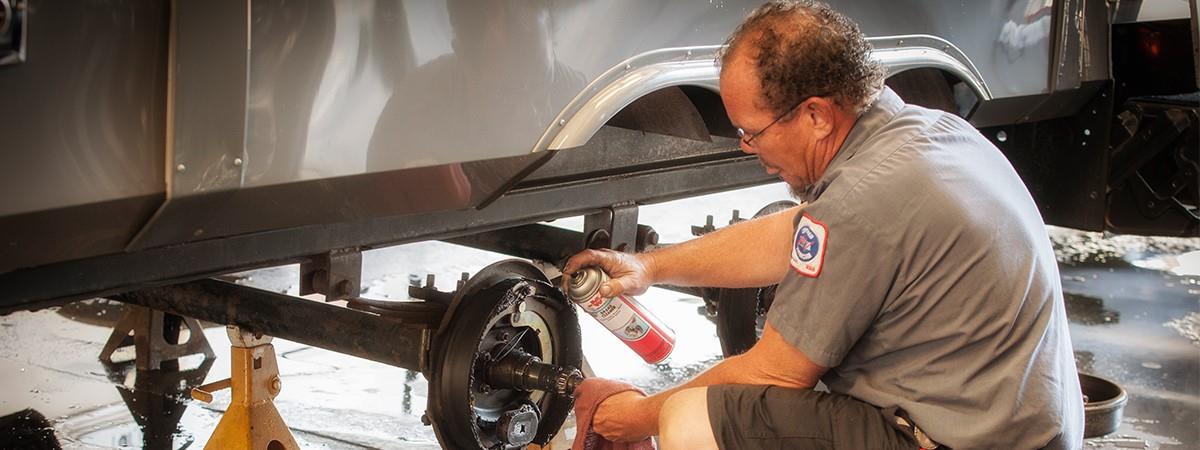
- RV Chassis Service: Lazydays offers a comprehensive suite of chassis services at many of our service centers. From tire replacements to oil changes, our technicians are trained to service gas, diesel, and towable coaches. Lazydays RV is a certified RV warranty repair center for leading chassis manufacturers like Spartan®, Workhorse®, and Roadmaster®.
To get started on de-winterizing your RV, schedule an RV service appointment at your nearest Lazydays RV location today!